I love meals that celebrate big, honest cuts—short ribs that fall apart, a ribeye with a fragrant crust, a pork shoulder that becomes confetti of tender meat. I’ll share practical techniques and sensible tricks I use when I cook them, nothing fussy, just reliable steps that reward patience.
Stick with me and you’ll find the balance between high heat and low-and-slow that turns a simple roast into something you want to sit with.
Braised Short Ribs With Red Wine and Root Vegetables
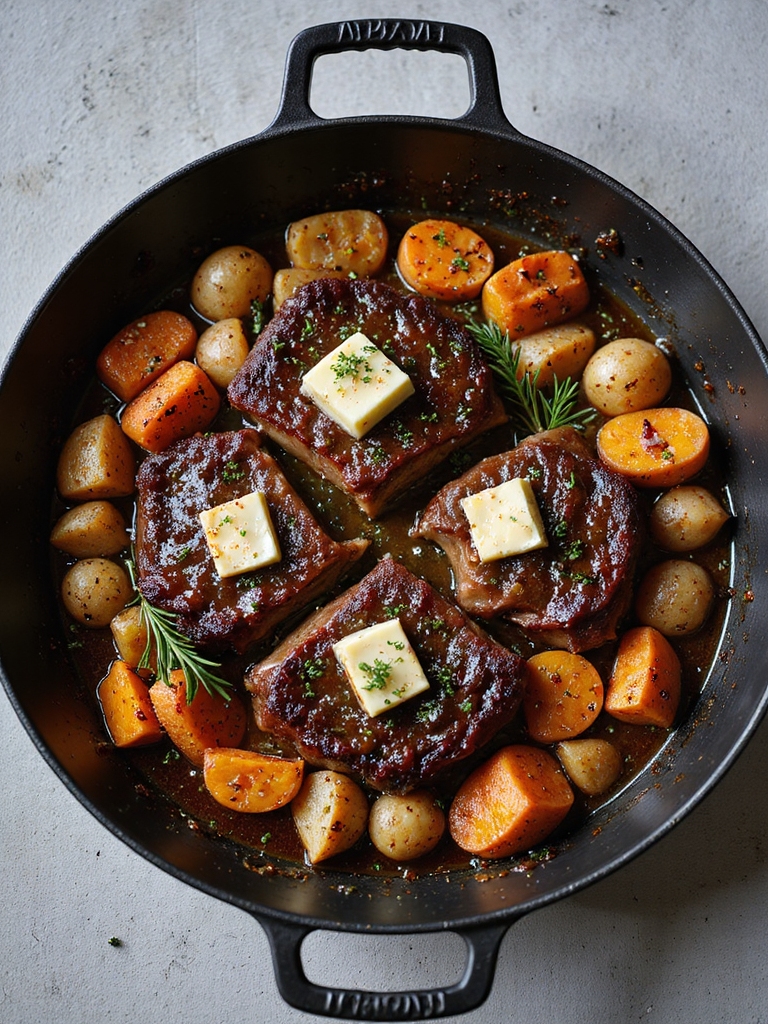
This braised short ribs with red wine and root vegetables recipe yields fall-off-the-bone beef with a rich, savory sauce and tender carrots, parsnips, and potatoes; it’s perfect for a weekend dinner and improves if made a day ahead so flavors meld.
- 3 lbs beef short ribs, bone-in
- Salt and freshly ground black pepper
- 2 tbsp vegetable oil
- 1 large onion, diced
- 2 carrots, cut into 1-inch pieces
- 2 parsnips, cut into 1-inch pieces
- 2 cloves garlic, minced
- 2 tbsp tomato paste
- 2 cups dry red wine (Cabernet or Merlot)
- 3 cups beef stock
- 2 sprigs fresh rosemary
- 3 sprigs fresh thyme
- 2 bay leaves
- 2 tbsp flour (optional, for thickening)
- 2 tbsp butter
- Fresh parsley, chopped for garnish
Season the short ribs generously with salt and pepper, sear in batches in a heavy Dutch oven with vegetable oil until deeply browned on all sides, remove the ribs, add onion, carrots, parsnips and garlic and cook until softened, stir in tomato paste and flour, then deglaze with red wine scraping up browned bits and reduce by half.
Return ribs to the pot, add beef stock, rosemary, thyme and bay leaves, bring to a simmer, cover and braise in a 325°F (160°C) oven for 2 1/2 to 3 hours until meat is tender, remove ribs and reduce sauce on the stovetop if needed, finish with butter, adjust seasoning, and serve over the vegetables with chopped parsley.
Let the braised short ribs rest 10 minutes before serving and refrigerate leftovers—reheating gently next day often improves the flavor; strain and skim fat from cooled sauce if you prefer a leaner gravy.
Crockpot versions of this dish allow for effortless slow cooking and are ideal for set-it-and-forget-it weeknight meals with robust, comforting results, especially when using savory crockpot techniques.
Cast-Iron Ribeye With Garlic Herb Butter
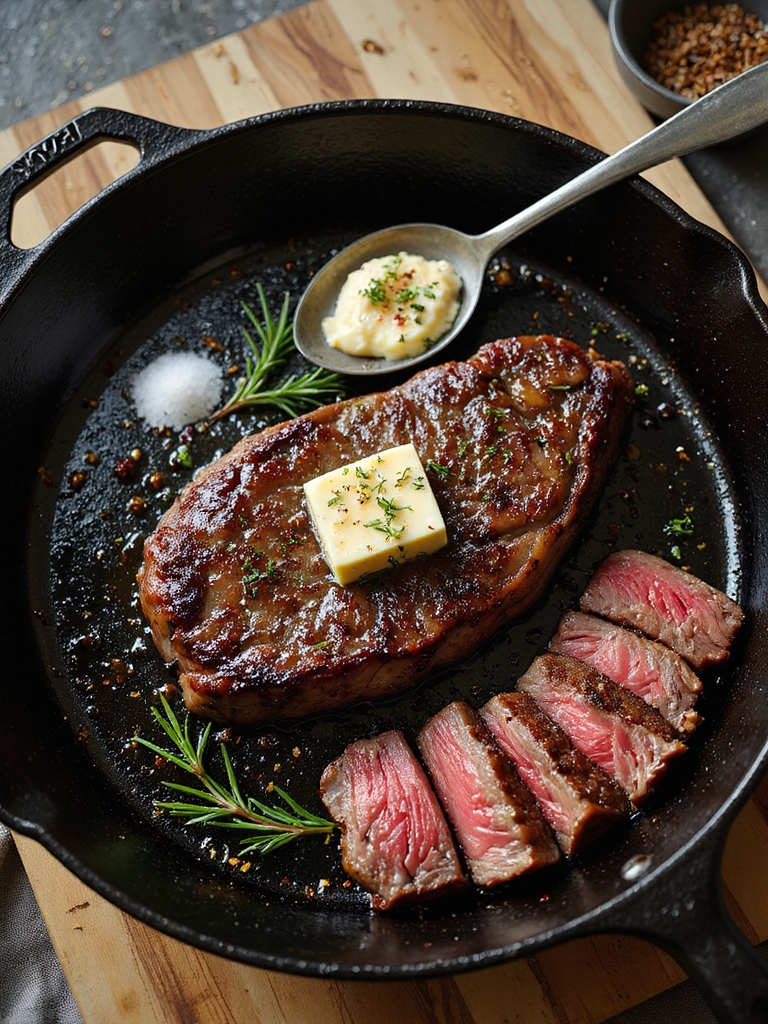
A perfectly seared cast-iron ribeye with garlic herb butter is a simple, restaurant-quality steak that pairs a deeply browned crust with a tender, juicy interior and a melting compound butter that adds fresh garlic, herbs, and richness; this method focuses on high heat searing, oven finishing, and resting so the steak cooks evenly and the butter flavors the meat without burning.
- 1 (1½–2-inch thick) ribeye steak, about 16–20 oz
- Kosher salt
- Freshly ground black pepper
- 2 tbsp vegetable oil or other high-smoke-point oil
- 3 tbsp unsalted butter, softened
- 2 cloves garlic, minced
- 1 tbsp finely chopped fresh rosemary
- 1 tbsp finely chopped fresh thyme
- 1 tsp lemon zest (optional)
- 1 tbsp chopped fresh parsley (for garnish)
Pat the ribeye dry and season both sides generously with salt and pepper, heat a 10–12-inch cast-iron skillet over high heat until smoking hot then add oil and sear the steak 2–3 minutes per side until a deep brown crust forms.
Reduce heat slightly and add butter, garlic and herbs spooning the melted butter over the steak for 30–60 seconds, transfer the skillet to a 400°F (200°C) oven and roast until desired doneness (about 4–6 minutes for medium-rare depending on thickness).
Remove to a cutting board, top with remaining garlic herb butter, tent loosely with foil and rest 8–10 minutes before slicing against the grain and serving.
Use a meat thermometer (120–125°F for rare, 130–135°F for medium-rare, 140–145°F for medium) to avoid overcooking, let the steak come to room temperature before cooking for even doneness, and keep the garlic/herb butter cool until the final basting to prevent burning while searing.
For equally dependable weeknight meals, consider adapting techniques from Quick and Easy chicken dinner recipes to simplify sides and prep while the steak rests.
Slow-Roasted Pork Shoulder With Crispy Crackling
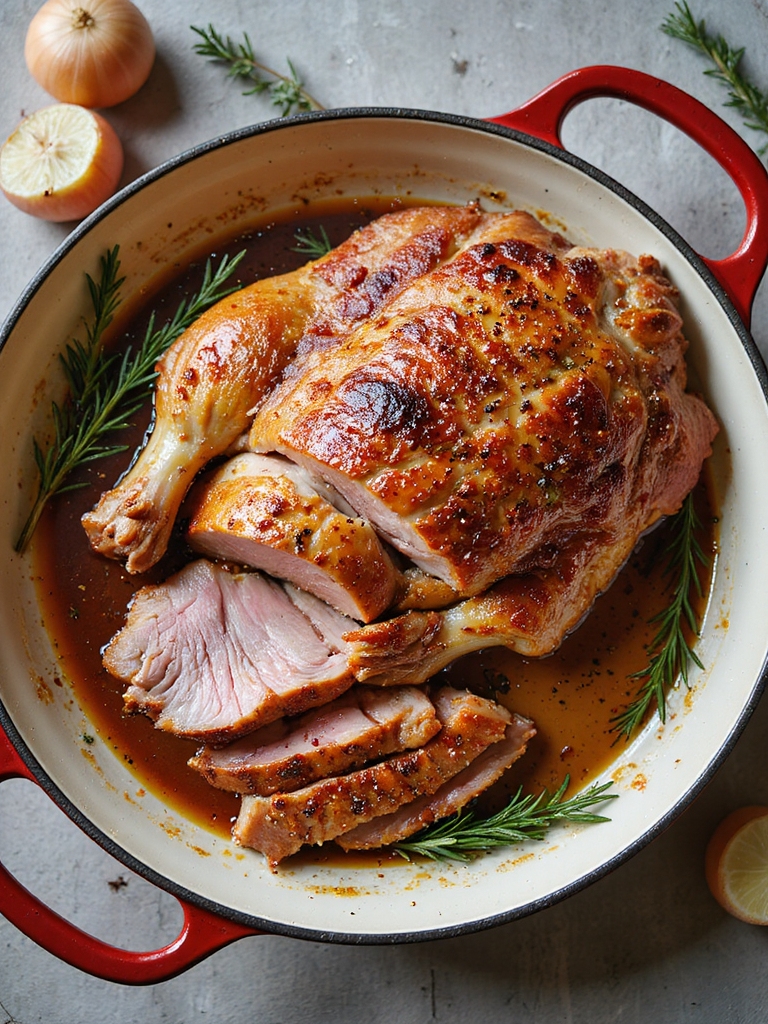
Slow-roasted pork shoulder with crispy crackling is a comforting, hands-off centerpiece that delivers fall-apart meat beneath a sheet of shatteringly crisp crackling; this method uses a long, low roast to break down connective tissue and a high-heat finish (or initial high-heat start) to puff the skin, with a dry rub of salt and aromatics and a resting period to let juices redistribute so slices or pulled pork remain moist while the crackling stays crisp.
- 4–5 lb (1.8–2.3 kg) bone-in pork shoulder (Boston butt) with skin scored
- 2–3 tbsp coarse sea salt (plus extra for skin)
- 1 tbsp brown sugar
- 2 tsp black pepper
- 1 tbsp smoked paprika
- 1 tsp ground cumin
- 4 cloves garlic, minced
- 2 tbsp olive oil
- 1 onion, quartered
- 1 cup low-sodium chicken stock or water
- 2 sprigs fresh rosemary
- 2 sprigs fresh thyme
- 1 bay leaf
- Juice of 1 lemon (optional, for rub)
Pat the pork skin very dry with paper towels and score the skin in parallel lines about 1/4 inch apart taking care not to cut into the meat, rub the meat (not the skin) with olive oil and the spice mix (salt, sugar, paprika, cumin, pepper, garlic and lemon) then pack coarse salt into the scores of the skin, place the pork on a rack over a roasting pan with onion, herbs and stock, roast in a preheated 300°F (150°C) oven for 4–5 hours until the meat is tender and pulls apart with a fork, then increase the oven to 450°F (230°C) or use a blast of the broiler/heat source to crisp the skin for 20–30 minutes watching closely until the crackling puffs and turns deep golden, remove and tent loosely for 20 minutes before carving or shredding and serve with pan juices.
Tip: For best crackling make certain the skin is as dry as possible (leave uncovered in the fridge for several hours or overnight), score evenly, use plenty of coarse salt in the scores, and finish on very high heat while monitoring constantly so the skin puffs without the meat drying out. This approach is a classic in many ground pork dinner recipes and showcases how a simple cut can feed a crowd.
Spicy Beef Brisket Burnt Ends

Spicy beef brisket burnt ends are a sticky, caramelized, smoky treat made from cubed brisket point that’s first slowly smoked or roasted until tender, then tossed in a spicy-sweet glaze and returned to high heat to develop deep charred edges and glossy bark; this version uses a bold dry rub, a long low-and-slow phase to render connective tissue, and a finishing sauce of brown sugar, honey, barbecue sauce and cayenne to create the classic molten, bite-sized morsels perfect for sharing.
- 3–4 lb (1.4–1.8 kg) beef brisket point or whole brisket (trim excess fat, reserve 1/4″ fat cap)
- 3 tbsp brown sugar
- 2 tbsp smoked paprika
- 1 tbsp coarse salt
- 1 tbsp black pepper
- 1 tsp garlic powder
- 1 tsp onion powder
- 1 tsp cayenne pepper (adjust to taste)
- 1 tbsp ground cumin
- 2 tbsp yellow mustard (as binder)
- 1 cup beef broth or strong coffee
- 1 cup barbecue sauce (your favorite)
- 1/2 cup honey
- 2 tbsp Worcestershire sauce
- 2 tbsp apple cider vinegar
- 2 tbsp unsalted butter, cubed
- Wood chips or charcoal if smoking (optional)
Coat the brisket generously with yellow mustard, then rub all over with the dry rub (brown sugar through cumin) and let sit 30–60 minutes at room temperature or overnight in the fridge; smoke or roast fat-side up at 225°F (107°C) for 5–7 hours until an internal temp of ~195–203°F and a probe goes in like butter, transfer to a cutting board and rest 20 minutes, cube into 1–1½” pieces, place in a foil pan with beef broth, pour over a sauce made by whisking barbecue sauce, honey, Worcestershire and apple cider vinegar and toss with butter, cover tightly and return to 275–300°F for 1–1½ hours until sauce is sticky and edges are caramelized, then uncover and broil or raise heat briefly to char edges, serve hot.
Tip: Use the point (more marbling) not the flat, monitor internal temp rather than time, rest before cubing, and balance sweetness and heat in the glaze to avoid burning while still achieving lacquered, caramelized edges.
For outdoor cooking enthusiasts, the Blackstone griddle is an excellent tool for achieving a consistent sear and finishing char on burnt ends when you finish over high heat.
Classic Roast Leg of Lamb With Rosemary and Lemon
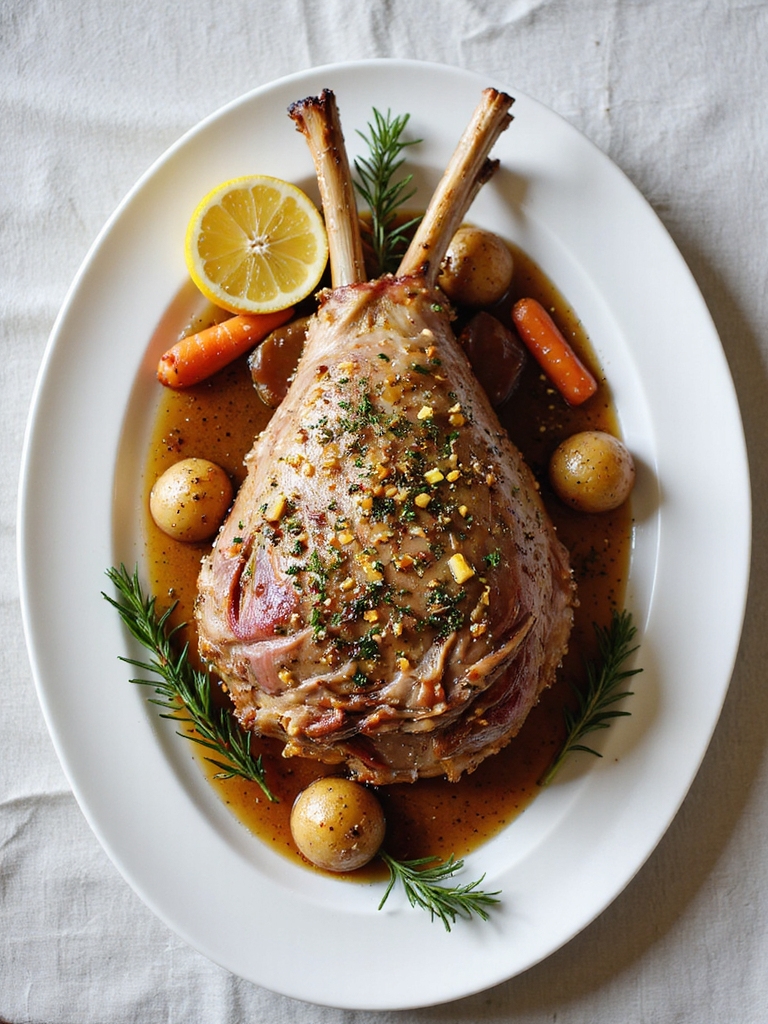
A classic roast leg of lamb with rosemary and lemon is an elegant, simple centerpiece that highlights the lamb’s rich flavor with bright citrus and savory herbs; this recipe uses a bone-in leg, a garlic-rosemary-lemon paste, a high-heat sear to build crust, then slow roasting to a medium-rare to medium finish, followed by a brief rest before carving so juices redistribute and the herb crust sets.
- 4–6 lb (1.8–2.7 kg) bone-in leg of lamb
- 4 tbsp olive oil
- 4–6 garlic cloves, minced
- Zest and juice of 1 lemon
- 2 tbsp fresh rosemary, finely chopped
- 1 tbsp fresh thyme, leaves only
- 2 tsp coarse salt
- 1 tsp freshly ground black pepper
- 1 tsp Dijon mustard (optional)
- 1/2 cup dry white wine or chicken broth (for pan)
- 2 tbsp unsalted butter (optional, for basting)
Preheat oven to 425°F (220°C). Pat lamb dry, score fat, and rub all over with olive oil, garlic, lemon zest and juice, rosemary, thyme, Dijon (if using), salt and pepper; sear in a heavy ovenproof skillet or roasting pan over high heat, fat-side down then all around until golden brown; transfer to oven and roast at 425°F for 15 minutes, then lower to 350°F (175°C) and continue roasting until internal temperature reaches 120–125°F for rare, 130–135°F for medium-rare, or 140–145°F for medium (about 15–20 minutes per pound after initial high heat), basting occasionally with pan juices or butter; remove from oven, tent loosely with foil and rest 15–20 minutes while deglazing pan with wine or broth to make a quick jus to serve.
When preparing, bring the lamb to near room temperature for 30–60 minutes before cooking, trim excess fat but leave a thin cap for flavor, use an instant-read thermometer to avoid overcooking, and allow a generous rest so slices are juicy and the herb-lemon crust firms up for cleaner carving. For a well-rounded meal, consider pairing the roast with classic chicken dinner side dishes such as roasted vegetables or mashed potatoes.
Coffee-Rubbed New York Strip With Charred Onions
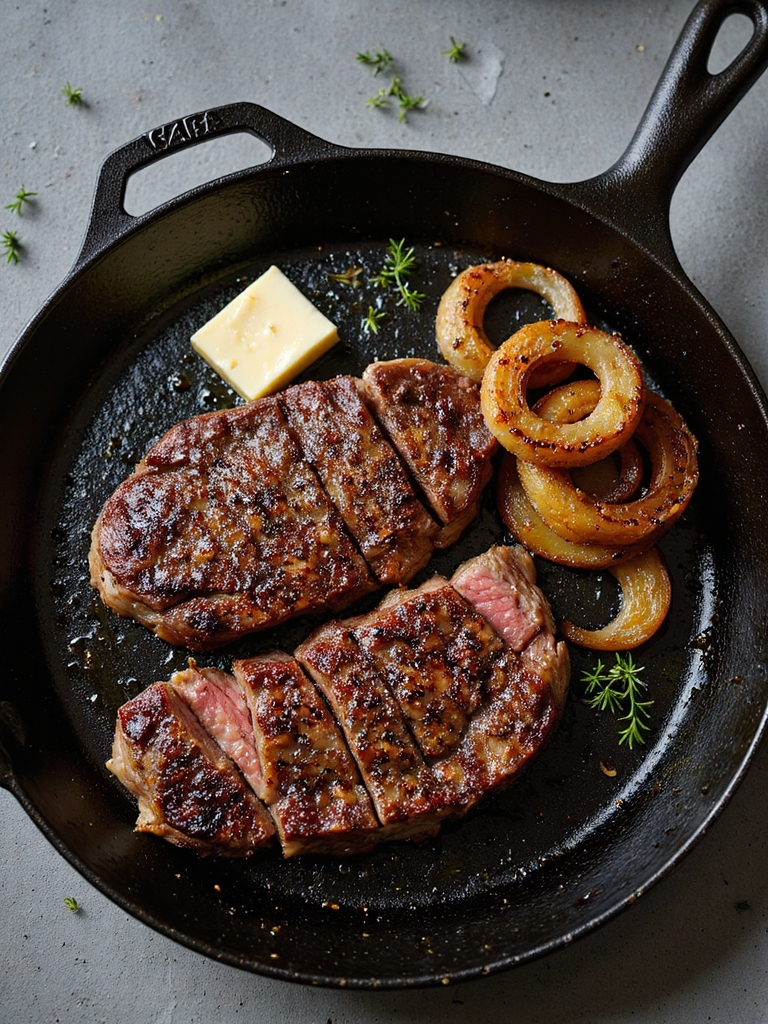
A coffee-rubbed New York strip with charred onions is a bold, savory steak that balances the deep, slightly bitter notes of espresso with brown sugar and spices to form a crusty bark; quick searing over high heat creates a caramelized exterior while a resting period guarantees a juicy medium-rare interior, and charred sweet onions add a smoky-sweet counterpoint that finishes the plate beautifully.
- 2 (12–14 oz / 340–400 g) New York strip steaks, about 1–1¼ inches thick
- 2 tbsp finely ground espresso or dark-roast coffee
- 1 tbsp brown sugar, packed
- 1 tsp smoked paprika
- 1 tsp ground black pepper
- 1 tsp kosher salt (adjust to taste)
- 1/2 tsp garlic powder
- 1/4 tsp ground cumin (optional)
- 2 tbsp neutral oil (canola or grapeseed)
- 2 tbsp unsalted butter
- 2 medium sweet onions (Vidalia or yellow), halved and cut into 1/2-inch slices
- 1 tbsp balsamic vinegar (optional, for onions)
- Fresh thyme or parsley for garnish (optional)
Pat steaks very dry and rub both sides with oil, then press the coffee, brown sugar, paprika, pepper, salt, garlic powder and cumin into the meat.
Heat a heavy cast-iron skillet over high heat until smoking hot, add oil and sear steaks 2–3 minutes per side for medium-rare (internal 125–130°F/52–54°C), add butter and baste once during the last minute, transfer to a cutting board and tent to rest 5–10 minutes.
In the same skillet char onion slices in batches over high heat until deeply browned and softened, finish with a splash of balsamic if using, then slice steaks against the grain and serve with the charred onions and herbs.
Tip: Use an instant-read thermometer to avoid overcooking, let steaks come to room temperature for 30 minutes beforehand, and don’t crowd the pan when charring onions so they develop good color rather than steaming.
This recipe is a perfect example of the bold cuts and true carnivore comfort featured in our collection of Savory Steak Dinner Recipes to Impress Tonight.
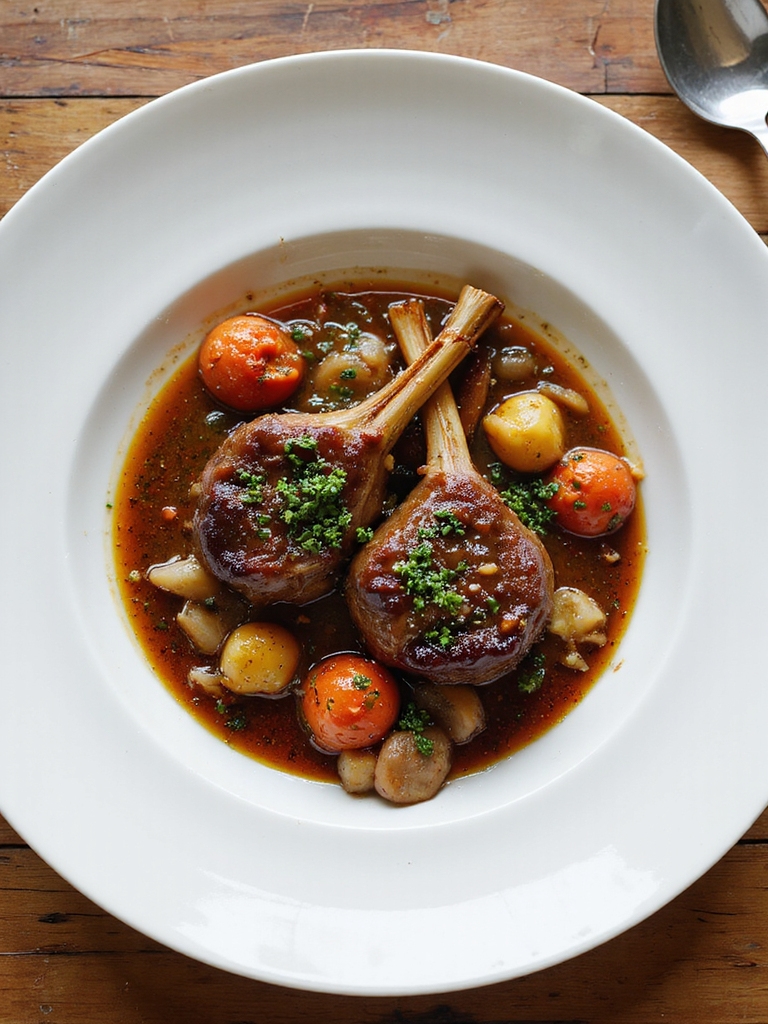
Moroccan-Spiced Lamb Shanks With Preserved Lemon
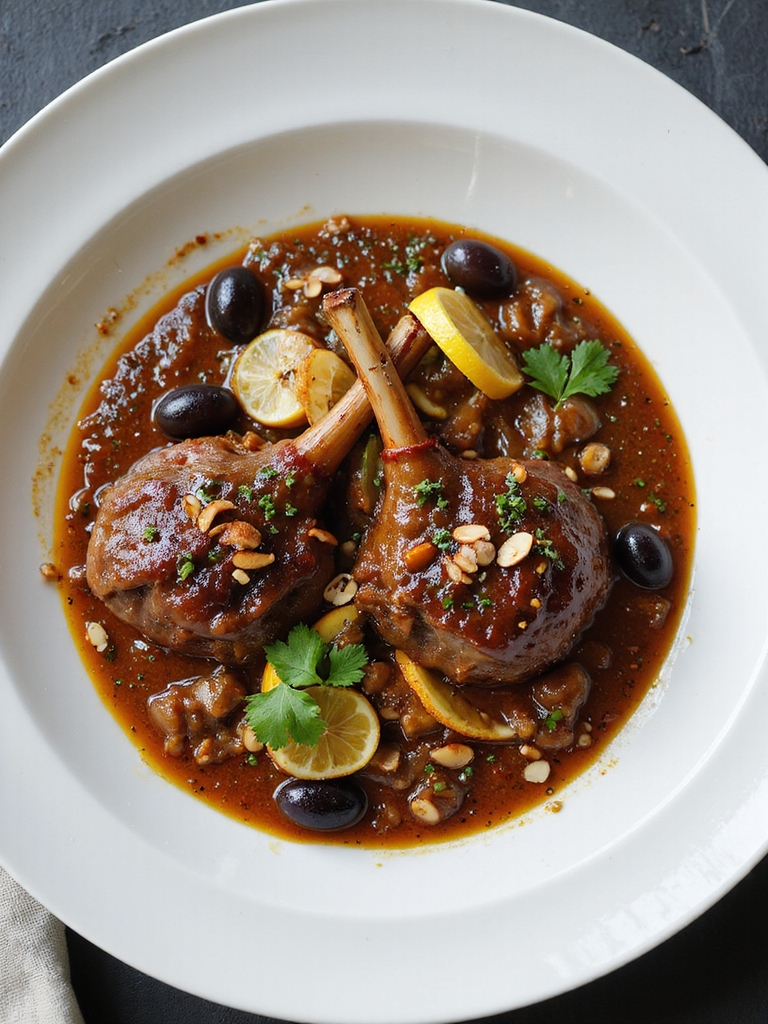
Moroccan-spiced lamb shanks braised slowly until fall-off-the-bone tender in a fragrant tomato-and-chicken-stock base with preserved lemon and olives for bright, salty contrast; warm spices like cumin, coriander and cinnamon, along with garlic, ginger and a splash of red wine, create a rich, layered sauce that soaks into the meat—serve over couscous or mashed potatoes and finish with fresh cilantro and toasted almonds for texture.
- 4 lamb shanks (about 3–4 lbs / 1.4–1.8 kg total)
- 2 tbsp olive oil
- 1 large onion, finely chopped
- 4 cloves garlic, minced
- 1-inch piece fresh ginger, grated
- 1 tsp ground cumin
- 1 tsp ground coriander
- 1/2 tsp ground cinnamon
- 1/2 tsp smoked paprika
- 1/4–1/2 tsp cayenne (optional)
- 1 tbsp tomato paste
- 1 cup crushed tomatoes (or passata)
- 1 cup dry red wine (or extra stock)
- 3 cups beef or chicken stock
- 1 preserved lemon, pulp removed and rind thinly sliced (or 2 tbsp preserved lemon rind)
- 1 cup green or Kalamata olives, pitted
- 2 bay leaves
- Salt and black pepper to taste
- Fresh cilantro or parsley and toasted slivered almonds for garnish
Preheat oven to 325°F (160°C); season shanks with salt and pepper, brown them well in olive oil in a heavy Dutch oven then remove; sauté onion until softened, add garlic and ginger briefly, stir in spices and tomato paste, deglaze with red wine, return shanks, add crushed tomatoes, stock, preserved lemon rind, olives and bay leaves, bring to a simmer, cover and braise in oven for 2½–3 hours until meat is tender and nearly falling off the bone, skim fat and reduce sauce on stove if needed, adjust seasoning and serve over couscous garnished with cilantro and toasted almonds.
Cook low and slow—brown the shanks thoroughly for flavor, remove excess fat from the braising liquid before finishing, and taste for salt after adding preserved lemon and olives since both are quite salty. Consider pairing this dish with other Indian dinner recipes like rich stews to create a diverse meat-focused meal, especially when serving multiple courses with delicious Indian dishes.
Pan-Seared Duck Breast With Cherry-Red Wine Sauce
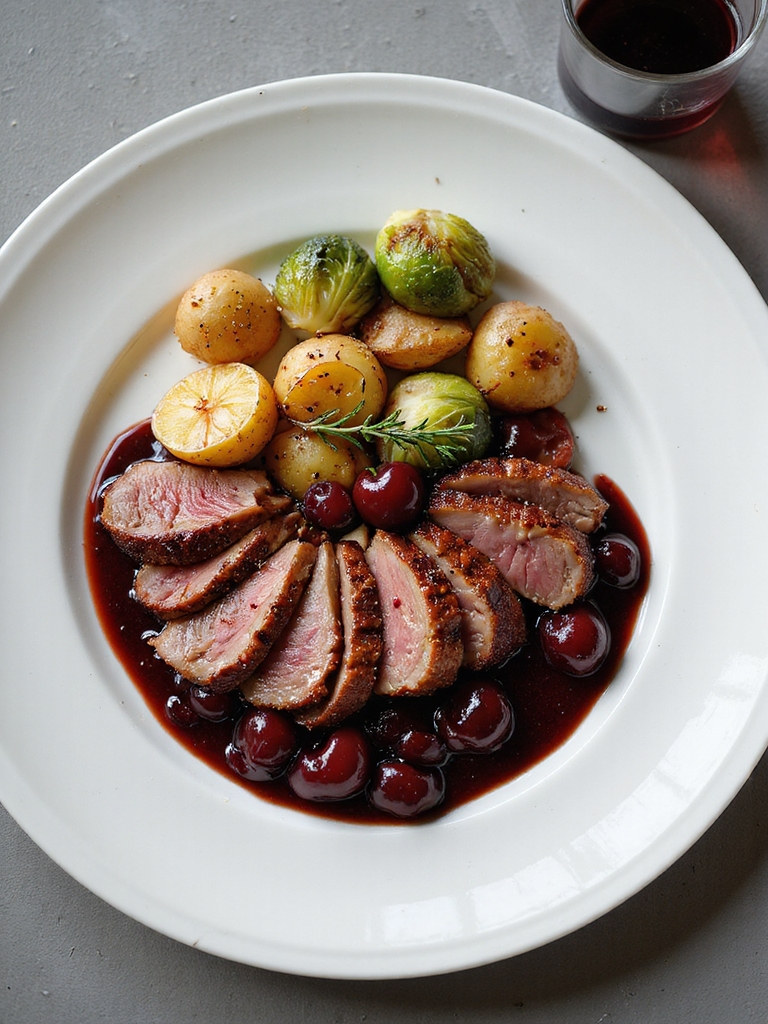
Pan-seared duck breast is a quick, elegant main with crisp, rendered skin and a glossy cherry–red wine sauce that balances the rich, gamey meat; score the skin, season simply, cook skin-side down to render fat and crisp, then finish flesh-side for medium-rare, rest briefly and serve with a pan sauce made by deglazing with red wine, reducing with cherries and a touch of balsamic or honey.
- 2 duck breasts (about 10–12 oz / 280–340 g each), skin-on, trimmed
- Kosher salt and freshly ground black pepper
- 1 tbsp neutral oil (grapeseed or canola)
- 1/2 cup red wine (Pinot Noir or Merlot)
- 1/2 cup chicken or duck stock
- 1 cup fresh or frozen cherries, pitted (or 1/2 cup jarred preserved cherries, drained)
- 1 tbsp balsamic vinegar
- 1 tsp honey or maple syrup (optional)
- 1 sprig fresh thyme (or 1/2 tsp dried thyme)
- 1 tbsp cold butter (to finish sauce)
Score duck skin in a crosshatch without cutting into the meat, season both sides, heat a cold skillet over medium and place breasts skin-side down (no oil at first if breasts are fatty), press gently for even contact and render fat for 8–12 minutes until deeply golden and crisp, drain excess fat, add oil, flip and cook 2–4 minutes for medium-rare (internal 125–130°F / 52–55°C), transfer to a plate to rest while making the sauce.
Pour off all but 1 tbsp fat, add cherries and thyme, deglaze with red wine, simmer to reduce by half, add stock, balsamic and honey, reduce until slightly syrupy, whisk in cold butter off the heat, season and slice duck to serve with the sauce.
Tip: Render skin slowly over medium to avoid burning and to get maximum crispness, rest the meat 5–7 minutes before slicing to keep it juicy, and taste the sauce for sweetness/acidity balance since cherry sweetness and balsamic can vary. This dish pairs beautifully with savory chicken breast preparations for a contrast of textures and flavors.
Grilled Tomahawk Steak With Chimichurri
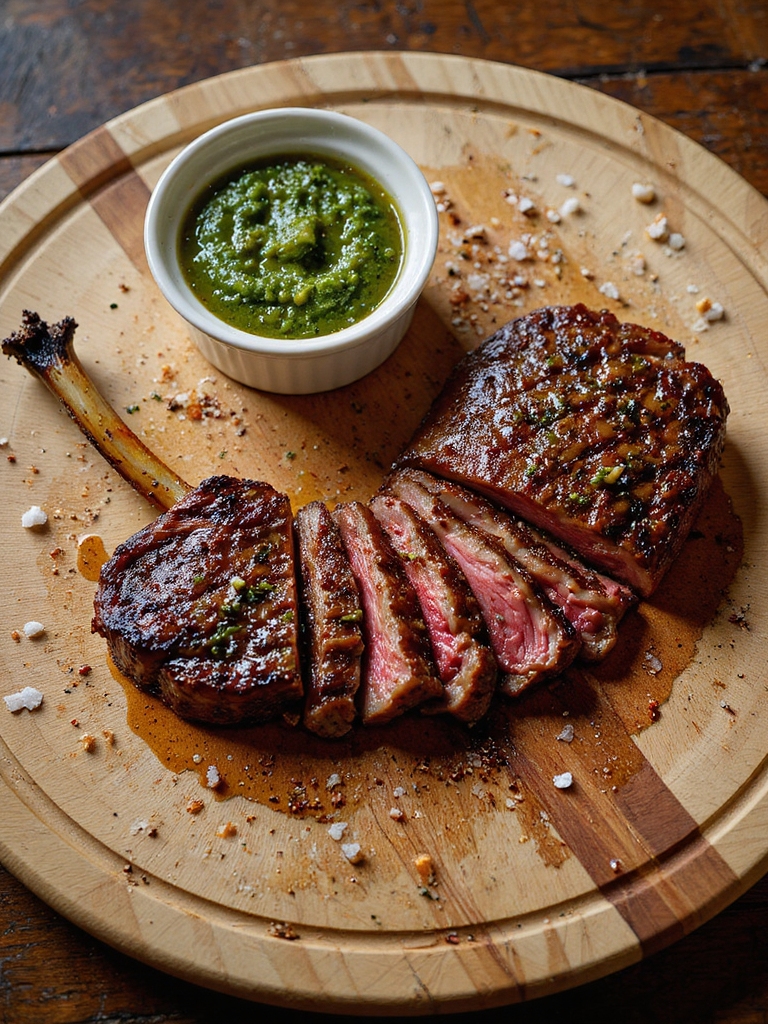
A grilled tomahawk steak is an impressive, bone-in ribeye cooked over high heat for a deeply caramelized crust and finished over indirect heat to your desired doneness; serve it sliced against the grain with a fresh, herbaceous chimichurri that brightens the rich, beefy flavor and use a meat thermometer to hit perfect medium-rare.
- 1 (30–40 oz / 850–1150 g) tomahawk ribeye steak, about 2–3 inches thick, at room temperature
- Kosher salt
- Freshly ground black pepper
- 1–2 tbsp neutral oil (grapeseed or canola)
- 1 cup fresh flat-leaf parsley, packed
- 1/2 cup fresh cilantro (optional)
- 4–6 garlic cloves
- 2 tbsp red wine vinegar
- 1/2–3/4 cup extra-virgin olive oil
- 1 tsp red pepper flakes (or to taste)
- 1/2 tsp dried oregano or 1 tsp fresh
- Salt and pepper to taste
- Lemon juice to taste (optional)
Pat the steak dry, rub lightly with oil, and season generously with salt and pepper at least 40 minutes before grilling or up to overnight refrigerated for deep seasoning;
heat a grill to high (500–600°F/260–315°C) with one side set for indirect heat,
sear the tomahawk 2–3 minutes per side over direct heat to develop a dark crust, then move to indirect heat and continue cooking with the lid closed until the internal temperature reaches 125–130°F (52–55°C) for medium-rare (about 20–30 more minutes depending on thickness),
remove and tent to rest 10–15 minutes while making chimichurri by pulsing parsley, cilantro, garlic, red wine vinegar, oregano, red pepper flakes and olive oil to a loose sauce and seasoning to taste;
slice the steak off the bone, cut across the grain into thick slices, and spoon chimichurri over or serve on the side.
Tip: Use a probe thermometer to avoid overcooking, let the steak rest to redistribute juices, and adjust chimichurri acidity and heat to balance the rich beef. Many home cooks find that pairing bold cuts with simple sides enhances the meal and stays true to Delicious Dinner Ideas.
Oven-Braised Osso Buco With Parmesan Polenta
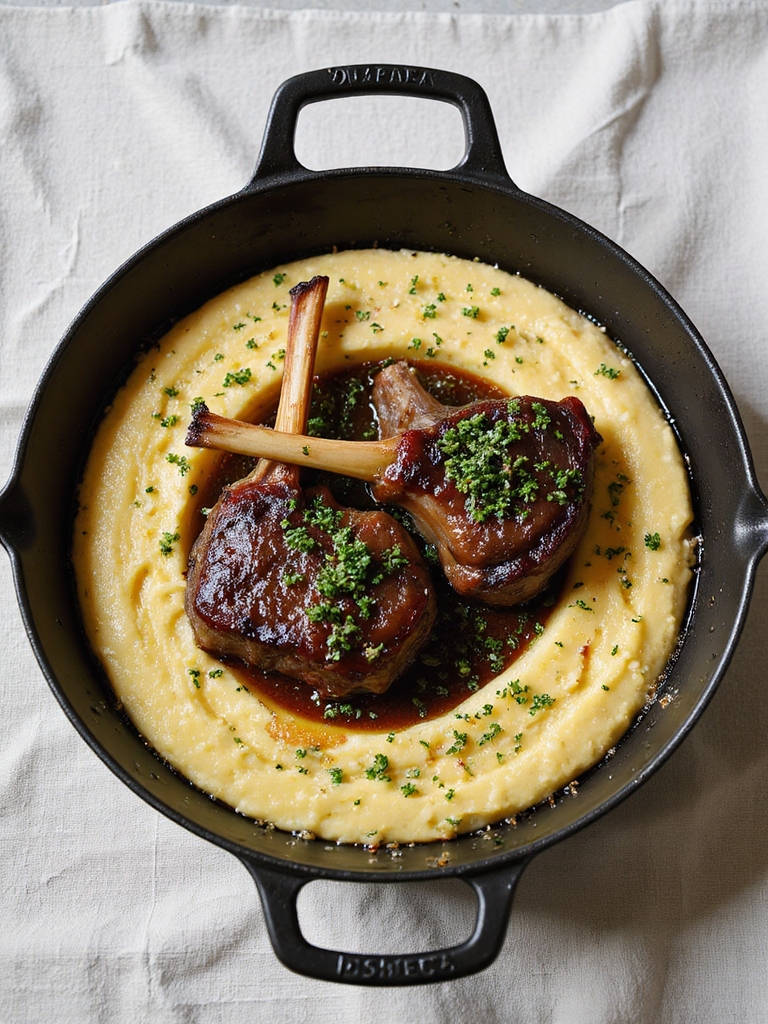
Oven-braised osso buco with Parmesan polenta is a rich, comforting Italian classic featuring tender, fall-off-the-bone veal shanks slowly braised in a fragrant mirepoix, tomatoes, white wine and aromatics until the marrow is silky and the sauce is deeply flavored, served over creamy, cheesy polenta that soaks up the juices; this recipe yields luscious braised meat with a bright gremolata finish to cut the richness.
- 4 veal shanks (about 1 1/4–1 1/2 lb / 550–680 g total), each 1 1/2–2 inches thick, cross-cut
- Salt and freshly ground black pepper
- 1/2 cup all-purpose flour (for dusting)
- 3 tbsp olive oil or vegetable oil, divided
- 3 tbsp unsalted butter, divided
- 1 large onion, finely diced
- 2 carrots, finely diced
- 2 celery stalks, finely diced
- 4 garlic cloves, smashed
- 1 cup dry white wine
- 1 (14 oz/400 g) can crushed tomatoes or 2 cups chopped fresh tomatoes
- 2 cups beef or veal stock (plus more as needed)
- 1 cup water
- 2 bay leaves
- 1 sprig fresh rosemary or 1/2 tsp dried
- 2 sprigs fresh thyme or 1/2 tsp dried
- Zest of 1 lemon (for gremolata)
- 2 tbsp chopped fresh flat-leaf parsley (for gremolata)
- 1 garlic clove, minced (for gremolata)
- 1 cup coarse cornmeal (polenta)
- 4 cups water or a mix of water and milk (for polenta)
- 1 cup freshly grated Parmesan cheese
- Salt and black pepper to taste
Pat the veal shanks dry, season with salt and pepper, dust lightly with flour and shake off excess; heat 2 tbsp oil in a large Dutch oven over medium-high heat and brown shanks well on all sides (about 4–5 minutes per side), transfer shanks to a plate, add remaining oil and 1 tbsp butter, sweat onion, carrot and celery until softened (8–10 minutes), add garlic and cook 1 minute, deglaze with white wine scraping browned bits, reduce by half, stir in tomatoes, stock, water, bay leaves, rosemary and thyme, nestle shanks back into the liquid, bring to a simmer, cover and transfer to a 325°F (160°C) oven and braise until meat is very tender and falling from the bone, about 2 to 2 1/2 hours.
Meanwhile bring 4 cups water (or water/milk) to a boil in a heavy saucepan, slowly whisk in polenta, reduce to low and cook, stirring frequently, until creamy and thick (20–30 minutes), stir in remaining butter and Parmesan, season to taste, remove shanks and skim or reduce braising liquid on the stove if needed to intensify flavor, serve shanks over a bed of Parmesan polenta and finish with gremolata made by combining lemon zest, minced garlic and parsley.
Tip: Brown the shanks well and don’t rush the braise—low-and-slow yields the best texture; make the polenta just before serving so it stays creamy and keep extra hot braising liquid to spoon over the dish if it needs more moisture. Lamb is a versatile alternative for ground recipes and complements many Mediterranean flavors in other dishes like kebabs or stews with ground lamb.